Vaadin Plugin for Spring Roo
Spring Roo is a lightweight developer tool that makes it fast and easy to deliver instant results. Best of all, you code 100% in Java and get to reuse all your existing Java knowledge, skills and experience.
注意:vaadin目前只支持SpringRoo1.1.5,
- Install SpringSource Tool Suite (STS): 安装STS
- Note that the current version of Vaadin plugin for Spring Roo (1.0.1 at the time of writing) is compatible with Roo 1.1.5 but not with the Roo 1.2.0M1 milestone build that is bundled with the latest STS versions. If using an STS version that comes with Roo 1.2.0M1, install Roo 1.1.5 for use with Vaadin.
- Install Vaadin Plugin for Roo. In Roo window do: 安装Roo的vaadin插件
- pgp trust --keyId 0xBF0451C0
- download accept terms of use
- addon install bundle --bundleSymbolicName com.vaadin.spring.roo.addon
- Install Vaadin Plugin for Eclipse: 安装eclipse的vaadin插件
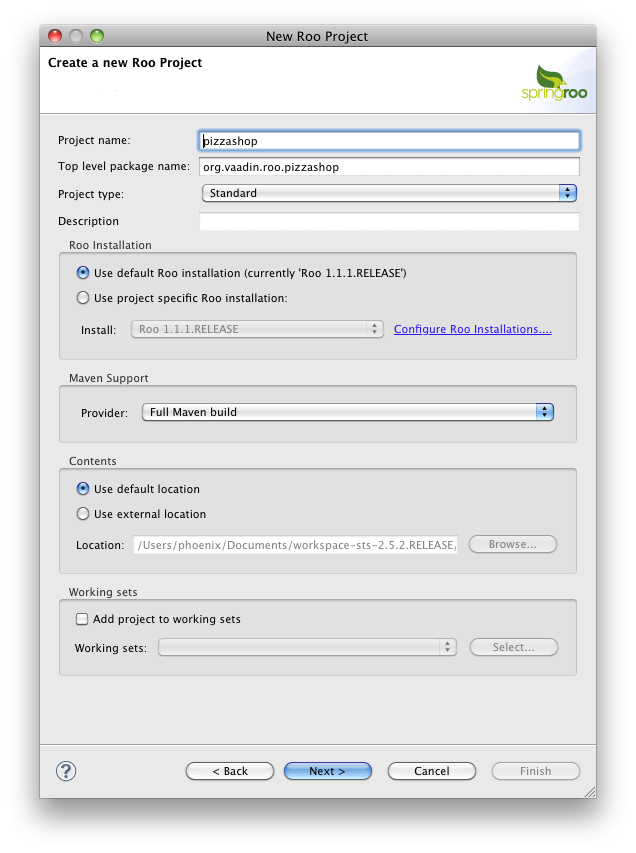
Creating your first Project
Create a new Spring Roo Project with the following top level package name: org.vaadin.roo.pizzashop.
Data Layer
Building a JPA-layer with Roo is amazingly easy. Just describe what you want and Roo generates the whole JPA -layer for you. Just type the following commands to Roo console in order to create a data layer:
persistence setup --provider HIBERNATE --database HYPERSONIC_IN_MEMORYentity --class ~.domain.Topping --testAutomaticallyfield string --fieldName name --notNull --sizeMin 2entity --class ~.domain.Base --testAutomaticallyfield string --fieldName name --notNull --sizeMin 2entity --class ~.domain.Pizza --testAutomaticallyfield string --fieldName name --notNull --sizeMin 2field number --fieldName price --type java.lang.Floatfield set --fieldName toppings --type ~.domain.Toppingfield reference --fieldName base --type ~.domain.Baseentity --class ~.domain.PizzaOrder --testAutomaticallyfield string --fieldName name --notNull --sizeMin 2field string --fieldName address --sizeMax 30field number --fieldName total --type java.lang.Floatfield date --fieldName deliveryDate --type java.util.Datefield set --fieldName pizzas --type ~.domain.Pizzaperform tests
The first run of this will take some minutes as it might load quite a few libraries, but in the end you should be greeted by something like this:
Tests run: 0, Failures: 0, Errors: 0, Skipped: 0[INFO] ------------------------------------------------------------------------[INFO] BUILD SUCCESSFUL[INFO] ------------------------------------------------------------------------[INFO] Total time: 3 minutes 53 seconds[INFO] Finished at: Tue Jan 11 22:56:11 EET 2011[INFO] Final Memory: 38M/82M[INFO] ------------------------------------------------------------------------
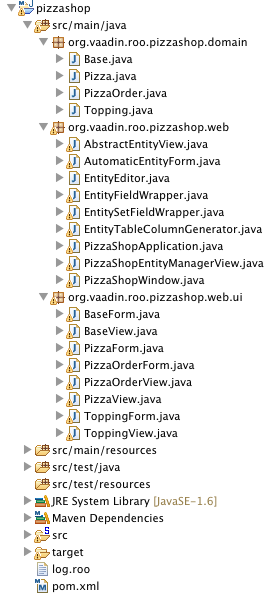
Generating the User Interface
Now we are ready to create a new Vaadin UI with Roo.
Lets first setup the Vaadin application where we generate the UI in. Vaadin Roo plugin will be supporting two ways of connecting the UI to JPA layer - here we choose the simple (non lazy loading) one built on top of BeanItemContainer. Instead we could (in short future) also choose to use full lazy-loading .
vaadin setup --applicationPackage ~.web --baseName PizzaShop --themeName pizza --useJpaContainer false
Then just press the generate "button" to do all the UI for us. Here we also enable the visual user interface composition.
vaadin generate all --package ~.web.ui --visuallyComposable true
Test Run
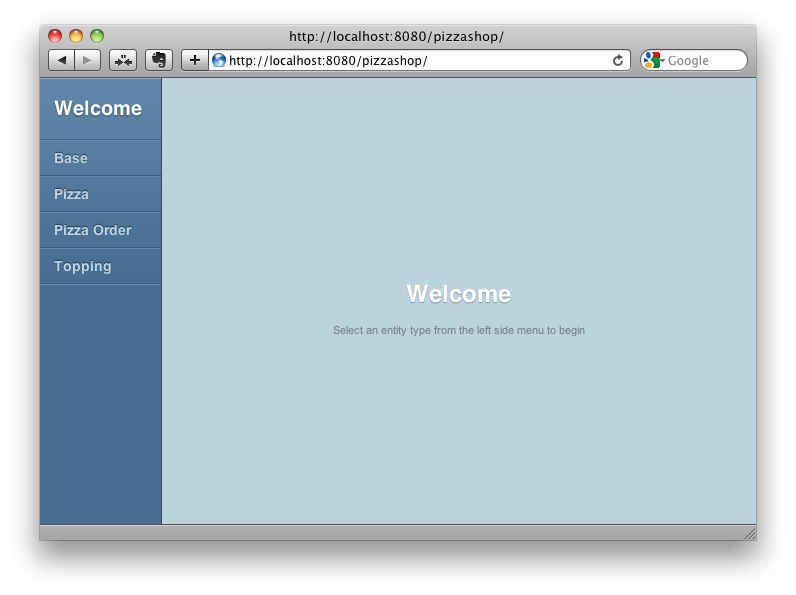
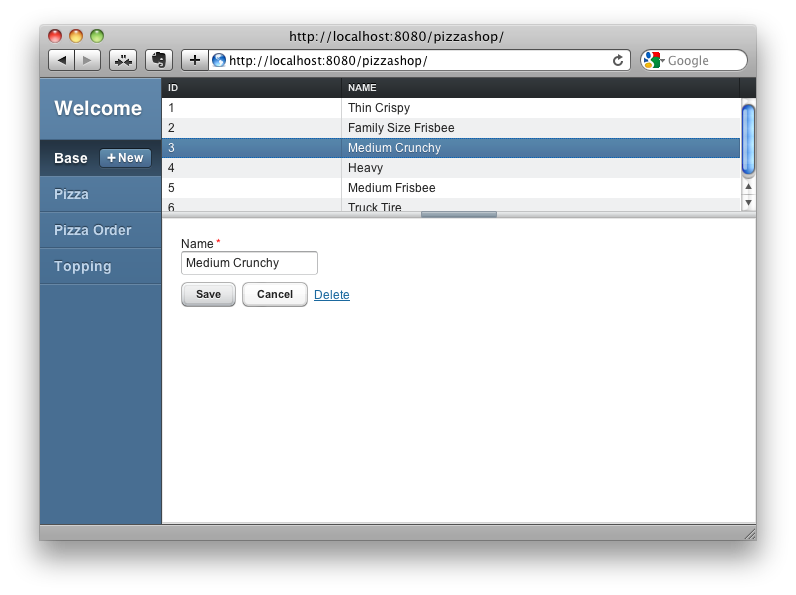
The project now implements a system for keeping track of pizza-orders. This includes a (in memory) database, JPA layer and Vaadin based user interface.
When we run the project (select "Run On Server"), it looks like this:
运行项目:工程根目录右键单击 run as -> run on server 就可以运行起来。
修改生成页面:找到ui包,以Form结尾的java文件,右键 openwith vaadin editor,(可能报xulrunner找不到的错误,忽略就可以了)
You can now open PizzaForm.java with Vaadin Editor in STS. Then click "Design" tab in the bottom right corner of the editor. What we get is the UI in a nice visual editor:
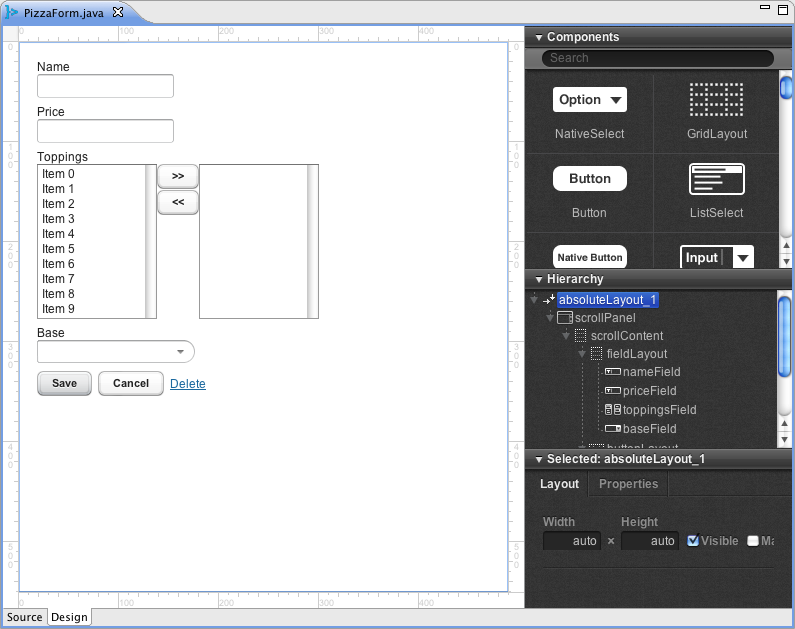
With the editor we can freely edit the layout for the UI.
First, change the fieldLayout component from VerticalLayout to AbsoluteLayout in order to make it more flexible. After a bit of drag and dropping components around, this might be what we have:
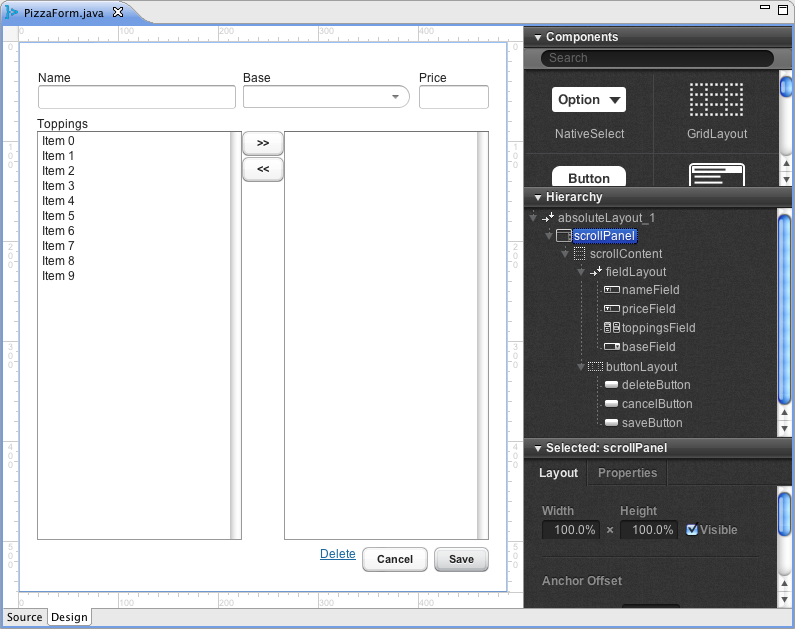
When we refresh the page in the browser with ?restartApplication in the URL, I the actual application shows our new layout:
Note that the whole application creation process is done without GWT compilation steps in between.
Limitations and Known Issues
If using JPAContainer, only EclipseLink is supported as the JPA provider. Hibernate may work if lazy loading is not used (all entity fields EAGER).
When compiling a widgetset with the "vaadin widgetset" commands, the compilation result goes to a directory which is not deployed to tcServer in STS or Maven Jetty plug-in by default. In STS, go to "Project Properties..." -> "Deployment Assembly" and add the directory target/[buildName]/VAADIN as /VAADIN .
Spring security is not supported in the current version.